I’m no stranger to antenna analyzers. I’ve been using them for close to 20 years ever since I purchased an MFJ-259, and up until recently I replaced it with my Rigexpert AA-600 professional meter. The AA-600 is an excellent product, but it, along with the MFJ meter are bulky. So I wanted something a little bit more compact for portable use. Enter the Rigexpert Stick 230. The Stick, as Rigexpert describes it, is a small, handy, and powerful vector network analyzer designed for measuring the most useful parameter of cable and antenna system in the range of 100 khz to 230 mhz.
I recently purchased this Stick 230 analyzer and have been using it for about a month. With that, I’ve gotten a pretty good feeling of its capabilities and its shortcomings. We’ll talk about what I like and don’t like about the Stick in a bit but first I’ll run down it’s specifications and give a demonstration on it’s use on a couple different antennas.
Looking at the box, it’s prominently marked that the Rigexpert Stick is made in the Ukraine. So this isn’t a piece of Chinese technology. When I ordered the Stick, I thought it would be a bit smaller, but I think the size is actually about right- It’s 7.3 x 1.6 x 1.3 inches and weighs 6 and a half ounces. Ergonomically it fits quite well in the hand and it doesn’t feel too light or too heavy. There’s a rubber cap to protect the UHF connector, but I’m sure I’ll lose that piece soon enough.
The specs on the Rigexpert Stick 230 are as follows:
- Frequency range of .1 to 230 Mhz with 1 khz resolution
- Measures SWR, return loss, X, Z, L C, magnitude and phase angle at a single frequency
- 100 Point graphical SWR chart
- UHF connector (SO-239)
- Rechargeable 3.7v lithium ion battery
- USB socket for charging and PC connection
- Bluetooth connection for Antscope App
- 200×200 monochrome e-paper display
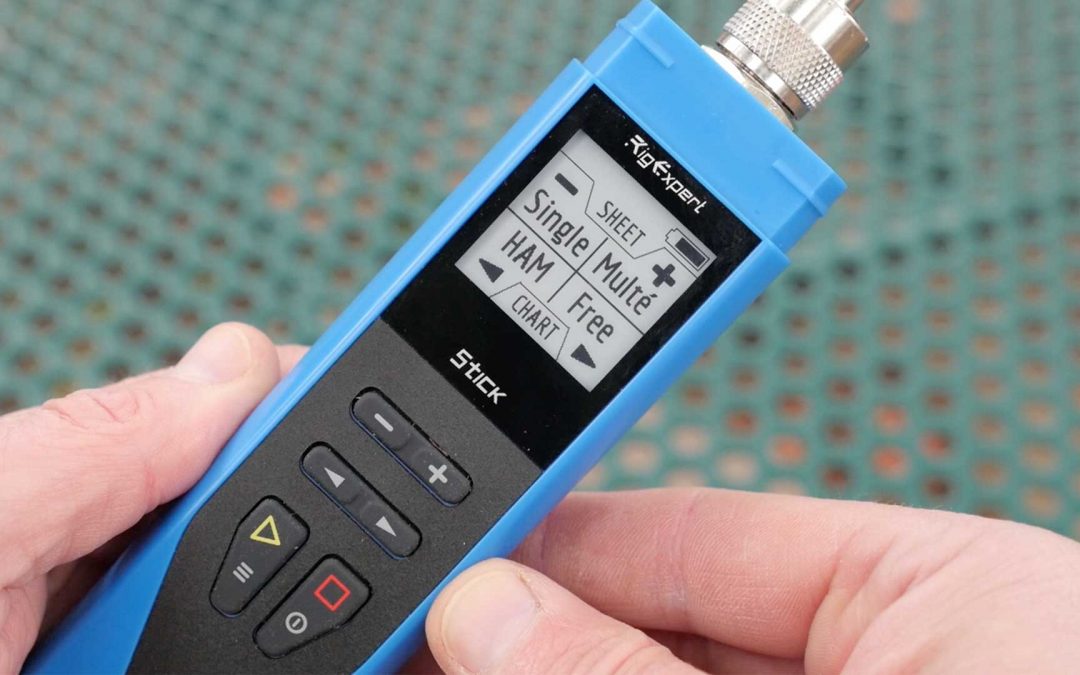
The thing that really impressed me about the stick is the display. When I first opened the box I thought there was a sticker demonstrating the display. But nope, peeling off the protective plastic just shows the unit’s e-paper display. This is the same type of display that’s used in e readers like the Amazon Kindle. These high contrast monochrome displays are known for their power saving features as no power is required to maintain an image on their screen. Plus the high contrast screen is very easy to read in bright sunlight, which is a definite plus for this analyzer.
Pressing the power button you feel a little buzz. Instead of beeping to indicate a button press, the unit vibrates slightly, much like your phone, for a quiet, sensory feel during its operation. The display does have a habit of blinking when the display changes. This is normal and is an artifact of the e-paper display.
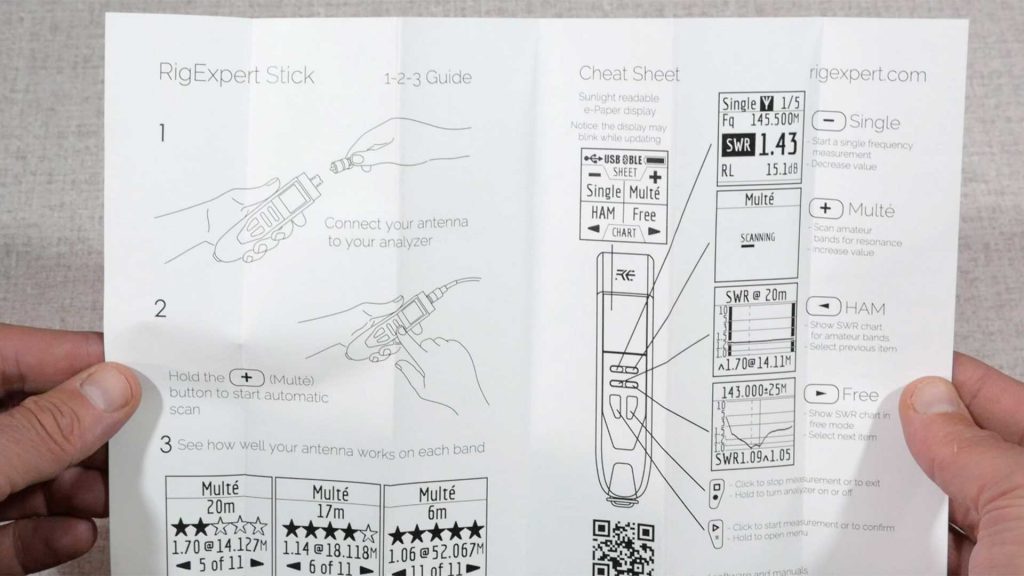
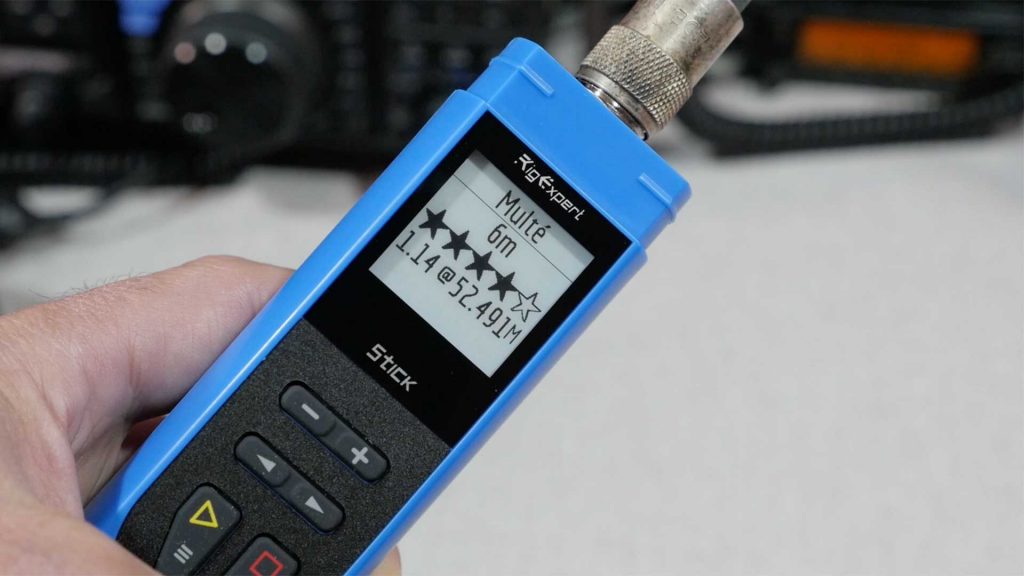
The box does not come with instructions. But you do get a one page sheet of paper that tells you the basic operation of the Stick. Basically it tells you to connect an antenna and press the Multe button. This will sweep the antenna and give you a rating of its resonant frequencies. I hooked it up to the 6 meter J-Pole that’s outside my house and it told me the antenna was resonant at 52.49 Mhz, which is right on as I tuned the antenna to 52.5 Mhz. It also uses a star system to rate your antennas. 5 stars is resonant. 3 stars it’s under 1.3 and 1 star means it’s between 2 and 3:1. It’s kind of a novel visualization and if you are 2 stars or above, you’ll know the antenna should work well without a tuner.
But the Multe setting is really handy for multi band antennas as it will rate the performance for multiple bands, or help you find the resonant frequency of an unknown antenna. For a demonstration of this, I’ll set the Chameleon MPAS 2 vertical antenna up in my back yard. This is a non resonant multi band antenna that uses a 5:1 transformer to give an acceptable match on the amateur bands. In most cases the SWR will be 3:1 or less and you can then finish the match with an antenna tuner. Plugging the Stick into the MPAS 2 and pressing the Multi button gives me 13 different matches under 3:1 in the in the entire spectrum of HF and VHF bands, rating each one with it’s star system. Now this isn’t necessarily an indicator of performance, but I do see that the best match is on the 20 meter band, and with a tuner I could use the antenna on any number of other bands.
So the Multe feature is a neat little trick to find resonance on your multi band antennas. But what do the other features do?
The display is broken into four functions: Single, Multe, Ham, and Free. The top two: single and multe display the results in number format and the bottom two Ham and Free display graphical charts.
The single function is probably the most useful if you are looking to tune an antenna. It will report the working frequency, SWR value, and return loss. You can also get the R, reactive, and X resistance values and inductance and capacitance values by scrolling to the following pages.

But say I want to tune an antenna like my Wolf River Coil Silver Bullet 1000. I’ll set up the antenna and its counterpoise and then connect the analyzer. I then need to pick my operating frequency. I set the unit to Single mode then long press the select button to set the frequency. Frequency is changed by using the arrows to move the cursor and the plus and minus to change the values. Then I press select and it will actively scan and display the SWR. as I move the tap on the coil I can see the changes on the display. Soon, I’m able to find a resonant spot and I can press the stop button to quit scanning. Using the arrows, I scroll through the pages and view the other values for the antenna, such as reactance and resistance and inductance and capacitance
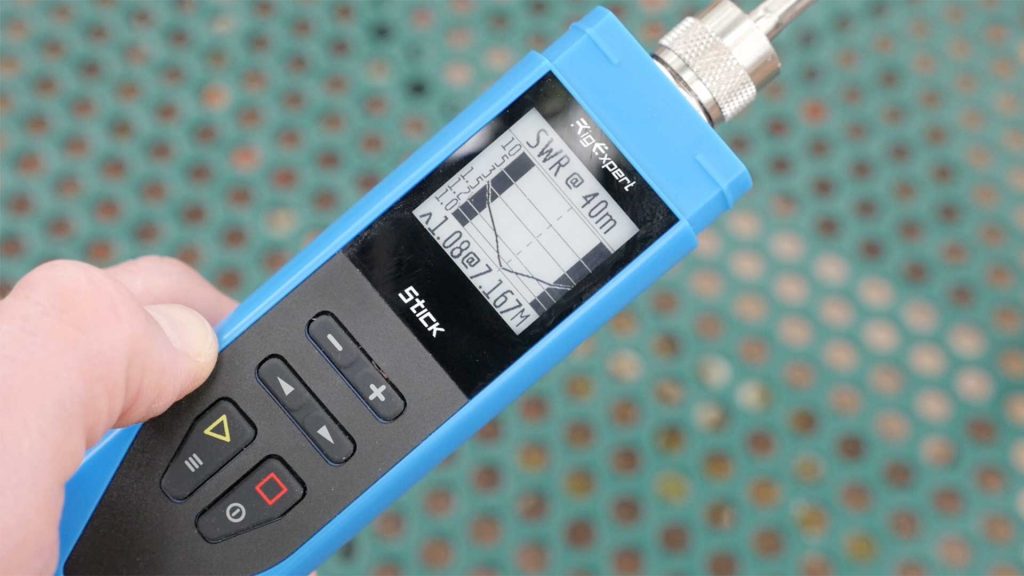
But numbers are one thing, sometimes it’s better to visualize an antenna’s performance on a chart. That’s where the HAM and FREE features come in handy. The Ham feature, much like the Multi feature, lets you view the performance of the antenna on the preset amateur bands, but instead of a number, you see a chart with the antenna plotted out for that band. If the antenna is resonant on that band you will see the dip on the chart, otherwise the Stick will tell you at what frequency nearest the band the antenna resonates at. Pressing the arrow keys lets you switch up and down the bands. Pressing the plus or minus keys will toggle the unit into Free mode which allows you to explore the chart a bit.
In Free mode you can shift the center frequency and the range of the chart. The plus and minus buttons change the frequency range and the arrow buttons change the center frequency of the chart. You’ll see the antenna’s plot on the chart in relation to the center frequency. If you want another scan of the antenna, you can press the Select button to sweep it again.
But the display may not tell the whole story, so the Stick has a bluetooth connection so you can control it with the Antscope software available for Iphone and Android. Antscope allows you to change the frequency, scan the antenna, and view the results as an SWR graph, Smith Chart, or table of parameters. You can’t save scans, but you can make a screen shot on your phone if you want to record the scan. The Stick also has an USB-C connection so you can hook it up to a PC and use the desktop version of Antscope for more analysis. So the Stick is more than an antenna analyzer, but instead a full featured vector network analyzer.
In finishing up my review of the Rigexpert Stick 230, let’s talk a bit about the good and the bad of this compact antenna analyzer.
First off the good:
Ergonomic design. It fits in the hand well and doesn’t roll off the table when you set it down. I like how it vibrates instead of beeping.
Long Battery Life. The specs say 16 hours on a charge. I’ve yet to wear down the lithium ion battery
Relatively easy to use. At first I was a bit dismayed with the single sheet of instructions, but in using the meter, I found it to be pretty user friendly. And just exploring with it has been the best way to learn how to use it.
E-paper display. I love the high contrast display and wish Rigexpert used it on their other units.
Now the bad:
Inconsistent user interface. In Single mode you use the plus and minus buttons to change frequency but in Free mode you use the arrow buttons to change frequency. This causes me grief to no end as I go into free mode and want to change the frequency range of the chart and end up messing my center frequency.
Buggy apps? I tested the iphone version of Antscope and it appeared to work well for me, but I’ve seen online reports that the Android version is buggy. I don’t know if that’s the case or not. But Rigexpert tends to be responsive to fixing problems.
Inability to save scans. Other Rigexpert meters will let you save your scans for later analysis in Antscope. This isn’t the case with the Stick. It doesn’t have a memory feature.
Let’s talk price. The Stick 230 retails for about $300. Street price is a bit less. This is the same as their AA-55 handheld meter. Now I admit Rigexpert devices aren’t cheap, they are professional level tools and they pack a lot of features into their devices. I guess I would have liked to see it priced a bit more competitively.
Final word on the Rigexpert Stick 230. I am impressed with the build level of the product, it’s features and capabilities. I purchased the unit to carry with me out in the field and I imagine the ideal user would be a person wanting an analyzer to tune HF vertical antennas like the Wolf River Coil, Super antenna, or any number of magnetic loop antennas on the market. The Stick is a definite upgrade from carrying a full sized analyzer and is much easier and convenient than the inexpensive NanoVNA products. I don’t feel like I’m giving anything up by having the Stick in my portable kit rather than a full feature analyzer. But is it for everyone? Probably not. If I was starting out and wanted an analyzer for antenna design and construction, I’d pick their AA-55 or AA-230, for the convenience of a bigger display and ability to save scans. But for field use, this is an excellent choice.
Then again you can usually get by without an analyzer in the field. Using one makes setup quicker, so I appreciate the convenience it offers. I’m happy with its performance and other than the user interface quirk that I discovered, I found it to be quite easy to use.
So there you go. Do you have any questions or comments on the Rigexpert Stick 230 antenna analyzer? Please leave them in the comments below. i’ll follow up on the conversation and may even pull out a few for my next Your Questions Answered video.
Recent Comments