Yaesu’s FTM-400XDR is an very popular dual band mobile radio that features some extremely sophisticated APRS features. APRS, or the Automated Packet Reporting System is a real-time tactical mode that allows you to transmit your geo location and send and receive short messages and beacons. What I like about the FTM400 is that everything you need is included inside the radio: the GPS, Tracker Module, and Display. Not only don’t you need any additional accessories, but you don’t have to worry about cables or connections breaking. But this popular radio has a very deep APRS menu, so today I’m going to break it down and show you how to get started with APRS quickly and easily. We’ll tackle the advanced features in a future video.
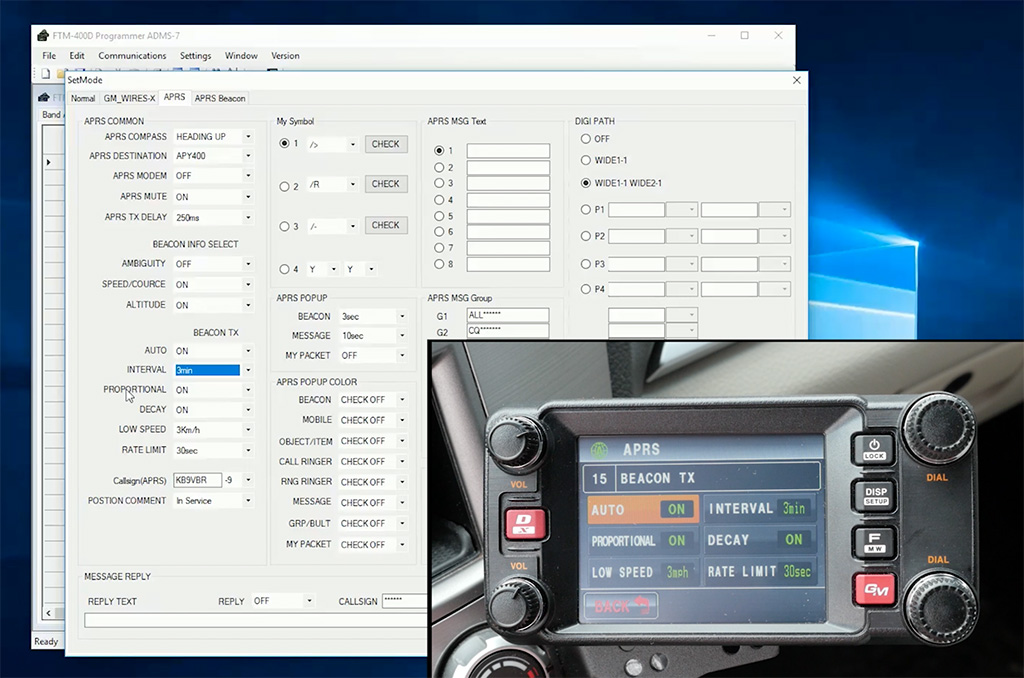
Starting out, I think the easiest way to set the APRS features is to do it via software. So I’m going to download my settings to an SD card and work on it in the comfort of my shack.
Watch the video for step by step instructions on:
- Setting a channel on the B band
- APRS Modem
- Icon and beacon text
- Path
- Beacon Rate
 Back in the vehicle, I’ve replaced the SD card and uploaded the changes to my radio. To get started tracking, I’ll first want to tune the B band to my APRS channel. Next I’ll go into the APRS menu and turn on the modem. The radio will start decoding packets on the APRS channel. At this point, I’m not transmitting until I turn the beacon on. So press the function button and select the Beacon button. Up in the corner of the display you’ll see either a hollow circle or a solid circle. You’ll want the solid circle as then the radio will beacon at standard intervals. The hollow circle means Smart Beaconing and we will talk about that in my advanced APRS for the FTM-400 video. so let’s take a drive and see how it works.
That’s it for the essential APRS features on the Yaesu FTM-400XDR. Do you have any questions on the APRS operation with this radio, please leave them in the comments below. I can add them to an advanced APRS operation with the FTM-400.
Nice video. I got it working now. Thanks for the video and the writeup.