Are you looking for a fun and easy antenna project? The 1/4 ground plane might be just the ticket.
If you are just starting out in amateur radio, you may not have collected the amount of resources that a more seasoned ham might have. This would also include antennas. If you were like me, your first radio was a little handheld that had sketchy transmit and receive on all but the closest repeaters. To the rescue, would be an external antenna. Fortunately there is an antenna that is inexpensive and simple to build with a minimum amount of parts and tools. That’s the the 1/4 wave ground plane antenna.
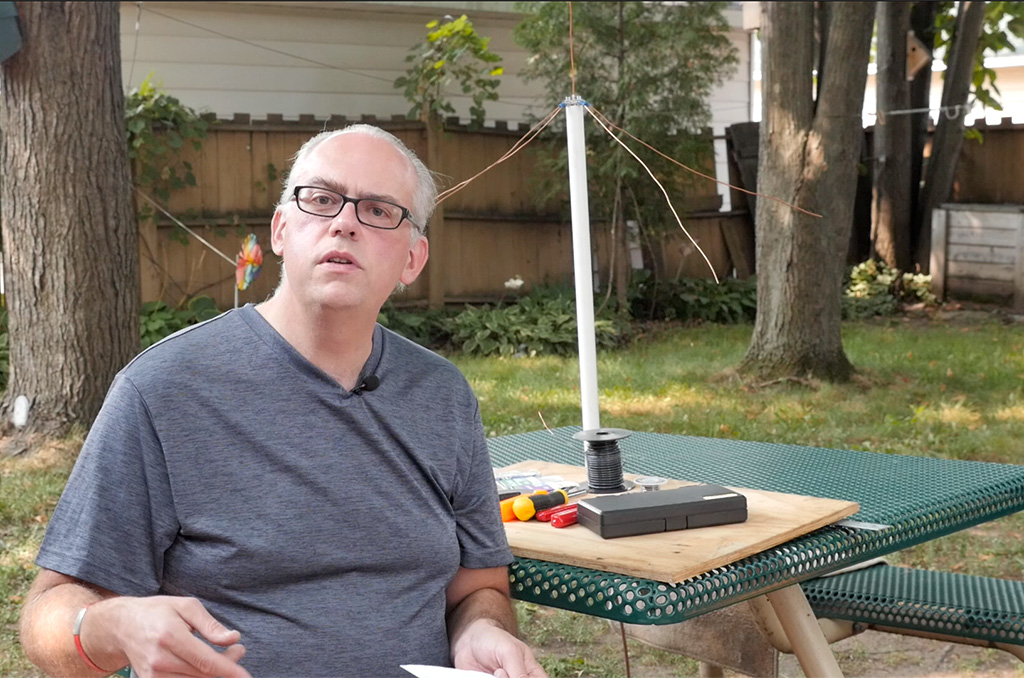 Today we’re going to build a simple ground plane for the VHF 2 meter band. Ground plane antennas are easy to recognize by their appearance. First off you’ll notice the radiating element. This element is 1/4 wavelength long, or about 19 inches for the 2 meter band. Next up are the ground radials. a ground plane will often have three or four radials, each 1/4 wavelength long. This particular ground plane is constructed out of an SO-239 chassis connector, so the radiator is attached to the center conductor of the connector and the radials each come off the base. A standard coax cable with a PL-259 connector is attached and serves as your feed line to the radio.
To build this antenna, we first need to make a couple calculations for the length of our radiator and radials. To do that we’ll use the formula of 234 divided by the frequency to get the length of the radiator. I’m building this antenna for the center of the 2 meter band, so I’m going to divide 234 by 146 Mhz. I’ll get 1.60 as my answer. That’s the length of the radiator in feet. So multiply that by 12 and my answer for the radiator is 19.2 inches. My ground radials need to also be 1/4 wave so I’ll use 19.2 as their length also.
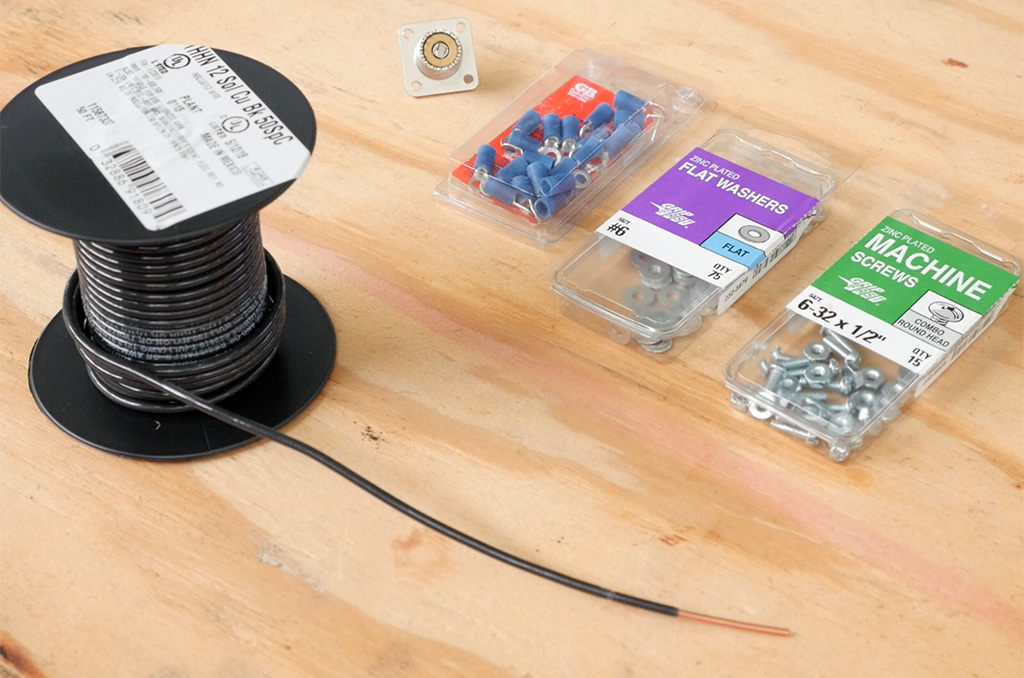 With that said, let’s assemble the parts and tools. I have a length of 12 gauge solid copper wire that I’ve stripped the insulation off. I’ll be using this for the antenna elements. Solid copper wire isn’t the most durable, so you can use other things like, 3/32 inch brass brazing rods, copper clad steel, or even metal coat hangers for your elements. Use whatever materials you have handy. Next I’ve got an SO-239 chassis connector. You’ll find these at hamfest or electronic stores. They are also available online, I’ve provided a link if you need search for one. I’ve also got some electrical ring connectors and some 6-32 x 1/2 inch nuts and bolts to attach the radials to base.
For tools, a soldering iron. i’m using the Iso-Tip butane iron since I’m outdoors, wire cutters, crimper, pliers and screwdriver round out that list.
So to put this antenna together, first measure out the elements using the formula. You’ll need five. One for the radiator and four for the ground elements. Next attach and crimp the ring connectors to the four radials. Then solder the radiator to the center connector of the SO-239. Finally, use the nuts and bolts to attach the radials to the connector. That’s all there is to it, your antenna is complete.
 So to mount this antenna, I saw another person use a length of PVC tubing as a mast. You can push the coax through a piece of 3/4 inch PVC, attach the antenna and let it rest on top. This may not be the most sturdy mount, but it’s quick and easy. Next connect the the antenna to a radio and give it a go.
 I hope you found this project to be simple and quick to do. This little ground plane will work with a handheld or a high power base radio, so don’t fear putting 50 watts or more power. You can also make this antenna for other bands also, 6 meter, 1.25 cm, or even the 70cm band. Just use the formula 234 divided by frequency for the length of your elements.
Hi there , I’ve always enjoyed you videos and thanks for posting them . Today I watched your post on the tribander hand held radio . I belong to the ft.myers amiture radio club in fla. , I just past in June the test for general. And have a homemade 4 band dipole and use a j pole for 2 meter/70 cm . We do have one or2 1.25 meter repeaters and we have a weekly net on 1.25 meters . Your video cause some thought into getting involved although I am a aways out of town . Do you made a jpole for 1.25 meters ? I also watched the 1/4 wave ground plaine video would there be any advantage to a 1/2 or 3/4 wave
Thank you for this tutorial, I enjoy making homemade antennas and this is simple as can be, but, very useful!
I made this antenna, and it works really good on 2 meter, and I can also work a 70c repeater 34 miles from the QTH. Not to bad for just using some old shop supplies. Thanks for the article. I still use your copper JPole for my main 2 meter comms, and wouldn’t trade it.
73 W4MKC
Awesome guide! Thanks for making it up. Getting 1:1.04 on my VHF 1/4 wave. Really happy with that.
73 KD2SHV