Here in the northern climes, the days are getting warmer and the snow is rapidly disappearing. But as warmer weather returns across the country, hams are getting ready to do their annual spring check and maintenance of their antenna systems. Winter can be hard on antennas: rapid cold and thaws, rain, snow, and of course ice can prematurely call an end to your radio transmitting. [pq]Pick a warm day, assemble some gear and go out and check your antennas.[/pq]
1. Sweep the lines for high SWR
As with anything, you don’t know you have a problem until you start having problems. Get out the antenna analyzer (borrow one from a fellow ham if you need to), attach it to the coax in the shack and run it up and down the operating frequencies to check the SWR of the antenna. Check the antennas manufacturing specs to see if your actual SWR has changed from the manufacturer’s ideal. Ideally you should be within 1.5:1 or less. If you see high SWR or the bandwidth is not as wide as before, you may need to do some additional work. Otherwise if the SWR looks good, move along to step 2.

Ideally your SWR should be 1.5:1 or less for the range of operating frequencies you most often use
If your SWR is marginally high but not an open short, check your coax for good connection, check the weatherproofing on your coax and make sure the coax line isn’t kinked. Kinked coax or water in your feedline can cause the SWR to rise. Next inspect the antenna. With the analyzer and a good piece of coax, connect to the feedpoint of the antenna. If the SWR checks out, then your problem is in the feedline. Otherwise the antenna may be damaged; swap out antennas and check the coax again to verify.
If your analyzer shows an open short, you either have an antenna with a broken feedpoint, or your coax connection is broken. Check the coax for broken solder joints in the PL-259 connector. Flexing and vibration can cause a poor solder joint to break. Check for continuity by doing the ‘wiggle’ test with the coax connected to the analyzer or a multi-meter. If the connection is sporadic, you will most likely need to replace the PL-259 connector. If the coax checks out, then the problem may be in the antenna. Swap out the antenna and test again.
2. Inspect the tower, mast, and guy lines.
If you have a tower, don’t consider climbing it to inspect antennas until an evaluation of the tower and its support structure are checked. If everything is safe and solid, then climb the tower (with proper equipment and ground crew) to inspect the antennas.
3. Inspect the antenna, mounts, and brackets.
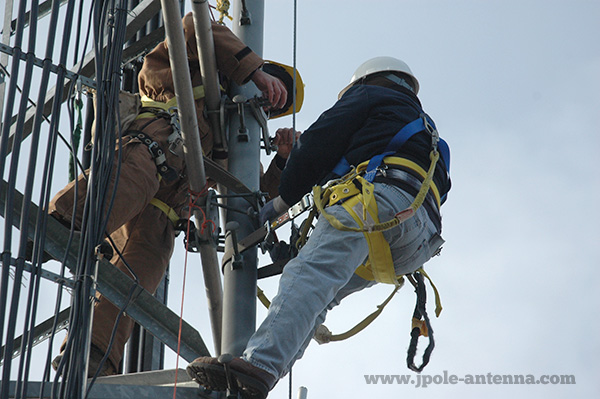
Always observe proper safety practices and procedures when climbing towers and other structures
Make sure there isn’t any damage from ice or rapid freeze/thaw cycles. Tighten any loose bolts and screws. Inspect the weather proofing. Retape any connections if necessary. I prefer a high quality electrical tape, like Scotch 33+ or Super 88 to weather proof my coax connections.
4. Check your wire antennas.
So far I’ve focused manly on vertical antennas, but your wire antennas need to be also checked. Sweep the lines first and then inspect the connections. Most wire antennas require a tuner, so you are mostly looking for open shorts and abnormally high SWR. If your SWR is higher than 9:1, you most likely have an issue with the connections, traps, or balun on the antenna. Next check the support lines for frays and wear, especially if you are using a tree for support. Rope can become brittle from UV exposure, so you may need to restring the support lines if they are more than a few years old.
While this is not an exhaustive check list, it gives you a good starting point for a thorough spring inspection. Repeat the same inspection in the fall before the weather gets cold, and you’re antenna systems will deliver years of dependable performance.
Do you have any spring antenna maintenance tips? Please share them in the comments below.
Thanks, I have just been searching for information about this topic for a long time and yours is the best I have found out till now.