Jason, N0BOY, has an improved design of his Anderson Powerpole conversion to the Yaesu FT-891 transceiver. I take you step by step through the process on how you can change the connector yourself.
There’s a lot of things that I love about my Yaesu, FT-891. Unfortunately the power connector isn’t one of them. Yaesu uses a 4 pin Molex connector on the back of the rig, and while that in itself isn’t a bad thing, if you use the radio portable for any length of time, this will happen. The connector loosens up and becomes a pain a butt.
A few months back Jason Wang, N0BOY came up with a great little mod to convert the Molex connector on the FT-891 over to a more friendly Anderson Powerpole connector. Powerpoles have become a standard in amateur radio emergency communications world, and while I use Powerpoles on almost all of my batteries and power supplies, I just neglected to make the conversion on my rig itself.
Parts needed
Yaesu FT-891 Powerpole Conversion (STL files)
https://www.thingiverse.com/thing:5577798
https://www.printables.com/model/418238-yaesu-ft-891-powerpole-conversion
Purchase an FT-891 Powerpole Conversion kit:
https://forms.gle/EGKaYYa485J8wiMW9
Fast forward to today, and Jason just released an upgraded design to the powerpole adapter. He strengthened a weak point on the back plane so it should be even more robust. With the announcement of this upgraded piece, i thought, now is the perfect time to upgrade my Ft-891.
If you have access to a 3D printer, you can make the pieces yourself. The STL files are freely available on Thingaverse. Or you can purchase a kit with all the parts directly from Jason. I’ll put links to the files and kits down in the video description below.
Before we begin, please be aware that modifying your radio may void the warranty. Mine’s long past that point, so let’s get started by printing the plastic pieces and converting my Ft-891 over to an Anderson Powerpole connector.
Assembling the connector
Now that I got the parts printed, lets assemble the rest of the items we’ll need for the powerpole modification. If you didn’t purchase the kit, you will need one set of Anderson Powerpoles with the 30 amp or 14-16 gauge wire inserts, two number 8 crimp on ring terminals for 14-16 gauge wire, a 45mm or 1.8 inch length of two conductor wire. I’m using some 14 gauge silicon that I had on hand, but 16 gauge will be fine. And finally an M3 by 12mm bolt and nut. Mine has a hex socket head.
For tools, other than the wire cutter and stripper and the powerpole crimper, I’m using the iFixit Mako 64 piece precision screwdriver set. This is essential if you want to do repairs without buggering up the little screw heads.
Remove the bottom cover of the Ft-891. There are four small screws bottom and two on each side. The cover will lift off. Locate the power connector, unscrew the leads from the board and remove it.
Next, assemble the new connector. Take 45mm or 1.8 inches of wire, and strip a small portion off each end, about a 5 mm or one quarter inch. Crimp a powerpole insert on one end and crimp the ring terminal on the other. Insert the powerpole insert into the shells, making sure the black wire goes into the black shell and the red into the red shell. Mate the two pieces together, remembering the phrase ‘ red right, tip top’.
Hey we’re half way done.
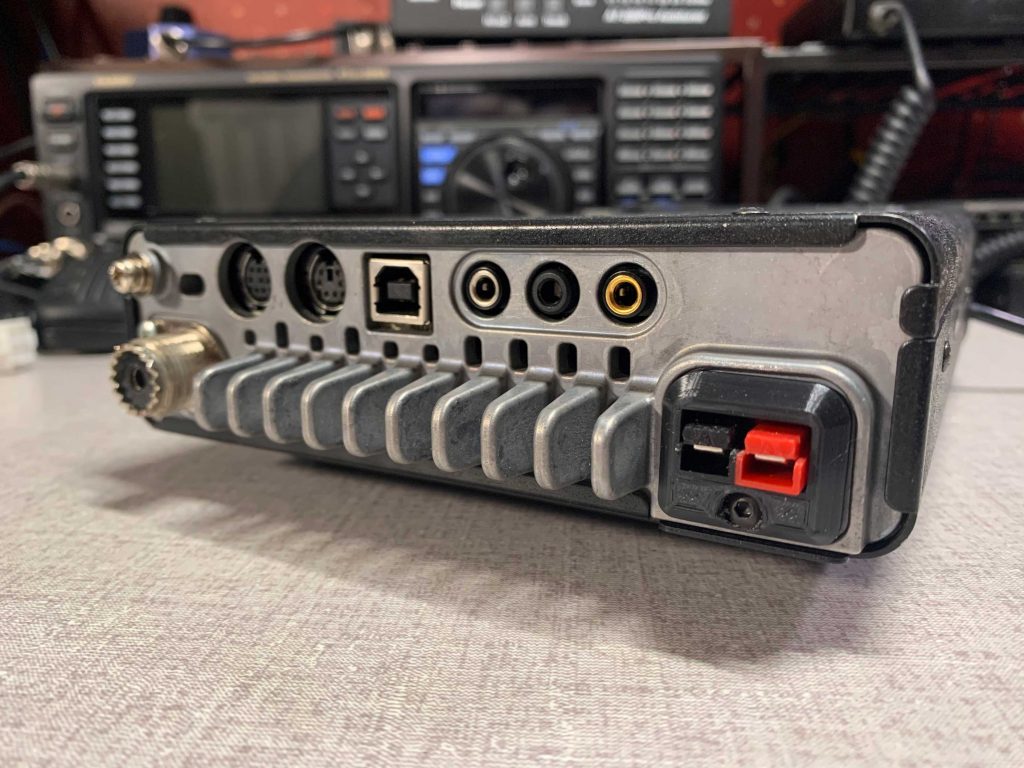
Next take the plastic printed and insert the powerpoles into the inside piece, taking care that the screw is at the top of our working position. Now for the hard part. But its really not that hard. See the little cutout on the side of the powerpole? The edge of the radio’s chassis needs to go in there so that the whole assembly is held into place. It takes a bit of dexterity, but when done, the whole thing should look like this.
After that, the outside piece will just fit into place. Screw the two pieces together with the bolt, there is a spot on the back for the nut to hold it all together.
Finally, screw the ring terminals back onto the board. The board is marked red for the positive lead and black for the negative. Don’t overtighten it. Do an inspection to make sure everything is hooked up correctly and that there are no loose connections or stray wire. If all is good, replace the bottom cover.
The project is complete. You can now hook up a battery or power supply and power up your rig. This whole project should take about 20 minutes, but if it takes longer, that’s ok. It’s not a race.
Yaesu FT-891 Powerpole Conversion (STL files)
https://www.thingiverse.com/thing:5577798
https://www.printables.com/model/418238-yaesu-ft-891-powerpole-conversion
Purchase an FT-891 Powerpole Conversion kit:
https://forms.gle/EGKaYYa485J8wiMW9
iFixit Mako 64 piece precision driver tool kit:
https://amzn.to/3kTOERG
Creality Ender 3 V2 Neo 3D Printer:
https://amzn.to/3kORO9s
Like what you see? You can leave me a tip:
https://www.paypal.me/kb9vbr
Become a patron! Unlock exclusive content at: https://www.patreon.com/kb9vbrantennas
Support Ham Radio Q&A by shopping at Amazon: http://amzn.to/2kO6LH7
Recent Comments