Part of my strategy for my recent ARRL Field Day participation was to run digital with my Yaesu FT-891. The plan was to operate FT-8 and also decode the ARRL bulletin and potentially send some radiograms via Winlink. Unfortunately I had issues with Winlink so that will be a subject for another video but I was able to successfully receive the bulletin and make a few FT-8 contacts.
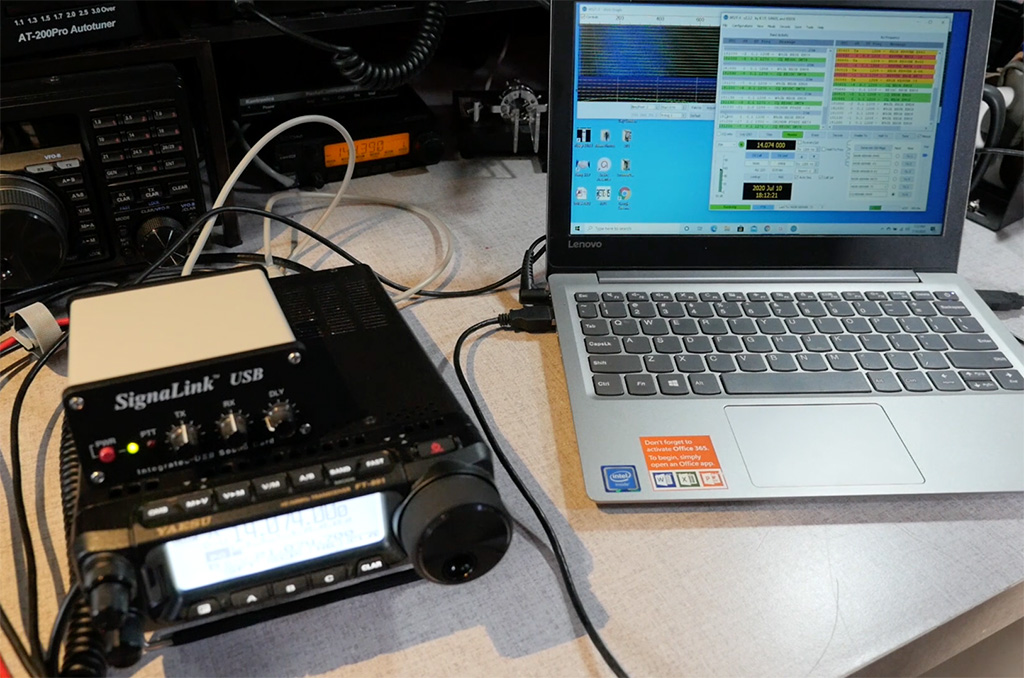
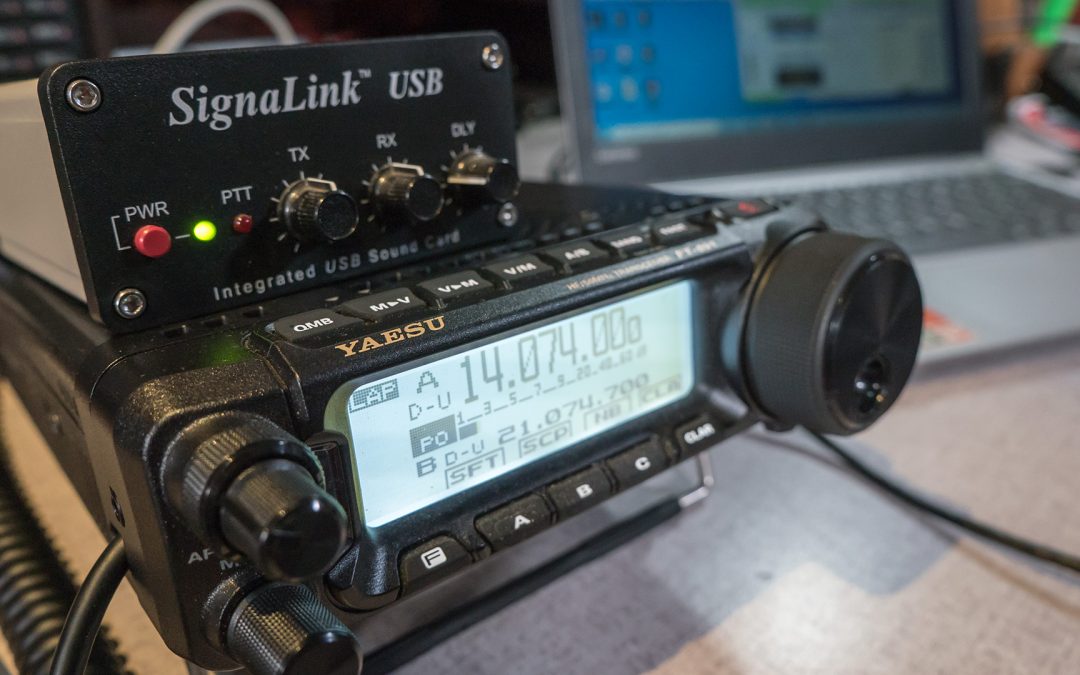
While many newer transceivers have built in sound cards that make configuration for digital modes easier‚ the FT-891 does not have a built in sound card. So you will either need to use patch cables to move the audio between the computer and the transceiver‚ or use an audio interface like the Signalink. My preference is to use the Signalink as it has two definite advantages over the patch cable route. First is that it provides audio isolation so you don’t end up with hum or ground loops. And the second is that system sounds won’t bleed into your operation as they will be routed through the computer’s audio device.
With that said‚ getting everything to work for digital on the FT-891 isn’t a straightforward process and I received a few questions‚ like this one on how to set things up:
I just got a SignalLink myself! Do you have a video where you describe your SignalLink setup?
In this video we will do three things: set up the Yaesu-FT-891 for CAT or computer control‚ adjust the digital mode settings in the transceiver‚ and configure WSJT-X for FT-8. We’re going to focus on WSJT-X but really once you get it set up and running‚ you should be able to take that knowledge and do the same with FLDigi or Ham Radio Deluxe.
To begin we will need the following: A Signalink Audio Interface with the USB cable and 6 pin data cable. The Signalink will need to be jumpered for the FT-891. You can do that yourself or purchase the Signalink jumper kit for that radio. Finally you’ll need a second USB cable for the CAT control.
Technically you don’t need the CAT control as you can run the Signalink using the radio set to VOX but when the CAT is enabled you will also have the ability to change bands and modes automatically from the program which is a lot easier than manually fiddling around and changing settings.
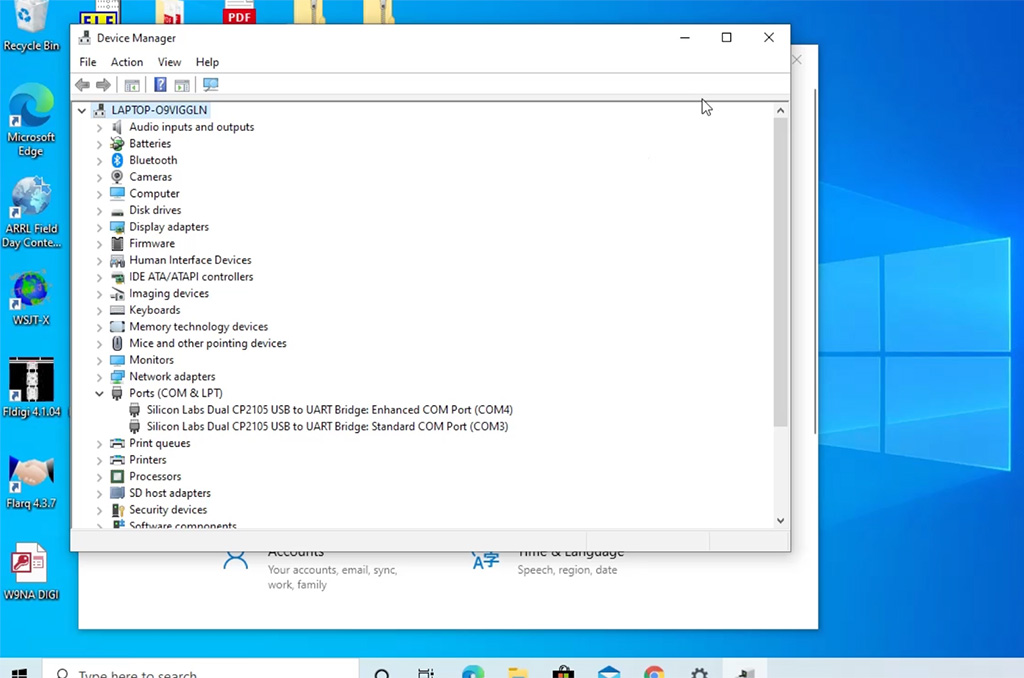
So let’s begin. First off you will need to install the Yaesu USB driver. Go to the Yaesu website‚ navigate to the FT-891 page and click on the files tab. You are looking for the USB driver and it is towards the bottom of the page labeled: FT-891/ SCU-17 USB Driver (Virtual COM Port Driver). Download this file. Now this is the important part‚ make sure the radio is not connected to the computer when you install the driver file. Unplug any USB cable running to radio and then install the driver. Once the driver is installed‚ turn on the radio and plug it into the computer. Windows will complete the driver installation. You’ll know that the installation is a success if you go into your Windows Device Manager and under Ports COM and LPT you will see two com ports. They could be a Com3 and Com4 or they could be two other sequential numbers‚ but they will be in order. The first or lower numbered com port is the enhanced com port and the second one is the standard com port. The standard port handles rig control and the enhanced port push to talk signaling.

If the installation didn’t work or you didn’t get two com ports‚ then disconnect everything restart the computer and try again.
Moving on to the second step‚ once we’ve got the driver installed‚ we need to adjust some settings in the radio. Go over to your FT-891 and give the Function F button a long press. This takes you into the settings menu. We’ll start at the first menu setting and scroll through‚ pausing at the spots where you will need to change or adjust the settings. I’ve got all these settings and the corresponding menu numbers in the video description below.
First we need to set the baud rate for the CAT control. Menu 5-6 is CAT rate and you can set that to 38‚400 bits per second. You can actually use any baud rate as long as you use the same value in WSJT. We’re going to use the fastest speed though.
Menu 5-7 CAT TOT or time out timer. Set this to 1000 milli seconds.
Menu 5-8 is CAT RTS. That’s request to send and set it to disable
Menu 8-1 is Data Mode. Set that to PSK
Menu 8-9 is Data in Select. Options are Mic and Rear. We are using the rear port with the Signalink
Menu 8-10 is Data PTT Select. Set that to DAKY
Menu 8-11 is Data out Level. That should be set to 50
Menu 8-12 is DATA BFO. Your options are Lower sideband or Upper sideband. Choose USB for Upper Sideband
Finally scrolling all the way to menu 16-03. Turn your HF power down to 20 or 40 watts. FT8 is a full duty cycle mode and prolonged use can be really hard on your transceiver and antenna. Plus you really don’t need to run at full power. You can choose to disagree with me if you like‚ but my recommendation for the FT-891 and a portable antenna is to keep the power under 40 watts.
Finally‚ once we have the radio settings in place. We can make the final configurations in WSJT-X. If you haven’t used WSJT-X yet or have an old version‚ make sure you download the latest from the website. There was a bug that was introduced in version 2.2.0 that broke the FT-891 control. The latest version 2.2.2 has the bug fixed‚ so if you are using 2.2.2 or later you should be fine.
There are two screens on the settings menu that you will need to adjust. Under file select settings and then go to the Audio tab. Now if you haven’t done so yet‚ plug the Signalink into the computer and turn it on. The Signalink receives its power over the USB so no additional power cable is required. The Signalink uses a universal driver so no additional installation is required. On the audio tab you will see that WSJT-X defaults to the standard audio device in your computer. You will want to change both the speaker and the microphone to the USB audio CODEC device which is the signalink. Once you press OK you should start receiving audio and decoding the signals.

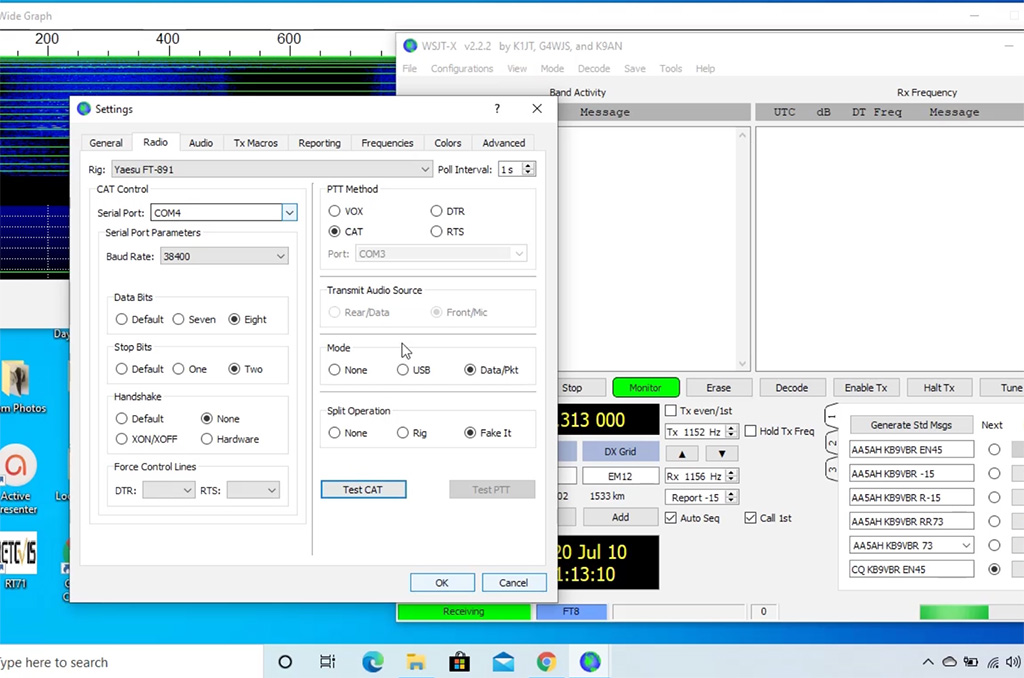
Next up is the radio control. This gets a little more complex‚ but if your Yaesu drivers are installed properly‚ everything should work. For rig, select the Yaesu FT-891. The poll interval is how often the computer checks the rig‚ you can leave that at 1 second. Next is the serial port for CAT control. Now as I said‚ the Yaesu drivers have two serial ports. The Standard Port is for CAT control and the Enhanced port is for Push to Talk. The standard port is always the higher of the two com ports so select the higher com port for CAT control. Baud rate should match what we have set in the radio. The data bits‚ stop bits‚ and handshake need to be set to eight‚ two‚ and none.
Next up is PTT Method. That toggles your Push to Talk. It should be set to CAT. You can use VOX and let the signalink handle things‚ but the CAT control method is much cleaner. I always get a little stuck on this item as the port field is grayed out and it needs to be set to Com3 or the lower of the two numbers. I’ve found if I click on RTS then the port field activates and I can change the menu item to Com3. Then I switch back to CAT and everything is good.
Transmit Audio source can be rear/data but that really doesn’t matter as you are using the signalink‚ mode will be Data/Pkt. You can use USB for Upper sideband but setting your radio to Data/Pkt means that you can configure all the digital settings to the data mode and the FT-891 will remember them. Then when you switch back to sideband mode‚ you don’t have to fiddle around with reconfiguring the radio for voice communication.
Finally there is split operation. You can leave it set to none or change it to Fake it. I need to talk a bit about split operation as this is a really interesting feature. In WSJT when split operation is enabled‚ it will adjust the radio’s frequency on transmit to give you the best audio quality. Remember‚ FT-8 signals fill up the entire upper sideband passband so multiple users can have conversations. But the transceivers are optimized to give their best audio quality in the mid-range. Audio in the low or high part of the spectrum may be distorted or clipped. Running split will slightly adjust your transmit frequency so the transceiver can transmit using mid-range audio tones. But to the listener on the other end it sounds normal but the transmit frequency shifted. It sounds complicated but really it’s just a neat little audio trick to boost performance.
Everything set? Good. Now press the Test CAT button. It will turn green when the program is communicating to the radio. If it doesn’t or turns red‚ then you have a communication issue to fix: usually its the port or baud rate‚ but in a worst case scenario it could be the driver. If you think everything is set correctly then restart the computer and try again. This refreshes things- especially if the computer went to sleep prior to you operating WSJT.
Now that we have everything set up on our radio and the computer‚ let’s try making a few contacts.

Do you have any questions about configuring the Yaesu FT-891 for digital operation with the Signalink interface? Please leave them in the comments below, I’d love to hear what I missed so please share your advice too. i’ll follow up on the conversation and may even pull out a few for my next Your Questions Answered video.

Recent Comments