With APRS or the Automated Packet Reporting System, we can control how our packets are disseminated in the system by choosing the appropriate path settings. Since APRS is a one to many form of communication: that is our packet could be picked up by any number of digipeaters, we will want to pick a path that is effective in covering our local area while not jamming the system with traffic stretching out hundreds of miles from its intended target. Remember with APRS’s network of digipeaters and Igates, we don’t need to get out far, just far enough for our packet to be picked up by the APRS internet stream.
So in this video we are going to dig a little deeper into the APRS protocol and talk about three important topics: Callsigns and SSIDs, Path Settings, and Beaconing or your beacon rate. My first video on APRS gave an overview of the mode, so if you are totally new to the Automated Packet Reporting System, you may want to watch that first. A link to it can be found in the upper corner of this video and the video description below.
Callsigns and SSIDS
Of course you will need to use your callsign in your APRS activities. But if you are running multiple devices, say a home station, mobile or a tracker, you will run into network conflicts if they both have the same callsign. SSIDs come to the rescue. The SSID or Secondary Station Identification is a numbered suffix that is added to your callsign to indicate that it is an additional station. APRS has the facility for up to 16 different SSIDs and certain numbers have been allocated to mean certain activities. The reason this is the case is that doing so made it easy to differentiate between a home station, digipeater, and mobile by using consistent identifiers.
 So to break things down, a home station will have no SSID or an SSID of 0.
Digipeaters are to use the SSIDs of -1 through -4. That gives you the facility for up to four digipeaters under your callsign.
-5 Smartphone users
-6 Satellite or special operations
-7 Reserved for handhelds such at the Kenwood D7 series or Yaesu VX8R
-8 Boats or maritime mobile
-9 Mobiles or trackers. The Kenwood D-710 usually also used -9
-10 Igates or internet operation
-11 is reserved for balloons. High altitude balloons will use APRS for tracking and telemetry.
-12 tracker boxes
-13 Weather stations
-14 is for truckers
-15 is for any other station, although it could also be use for an additional tracker, digi, or mobile
So in my case, I have no SSID for my home station, a -7 for my Yaesu handheld and any tracker boxes I may use will have a -9. That lets me keep three stations on the air with one callsign and they become easy to differentiate on the map what their purpose is.
Now these SSID numbers aren’t hard and fast rules, and you could potentially use any SSID for your purpose that you choose. The only guidelines with SSIDs is that they give a quick visual clue of the purpose of a particular object without the need of graphical icon or verbose description.
Path Settings
Back in the 1990’s, when APRS first gained popular acceptance, the network had large coverage gaps and Igates were few and far between. Stations would use long paths and relays in order to propagate their packets. But this soon led to congestion and by 2004, Bob Bruninga, WB4APR, advocated for a new APRS path paradigm. The new paradigm consisted of several small changes, but in the long run contributed to a 5 times improvement in local reliability. The biggest change in the new paradigm was how we specify our packet path.
The Path is the route or distance an APRS packet will propagate before is expires from the network. In my introduction to APRS video i mentioned that APRS is not a long distance or DX form of communication, and you don’t want to light up every digipeater in a 500 mile radius. But instead the purpose of the path is to get your signal out well enough so that it’s heard by an Igate and funneled to the APRS internet stream.
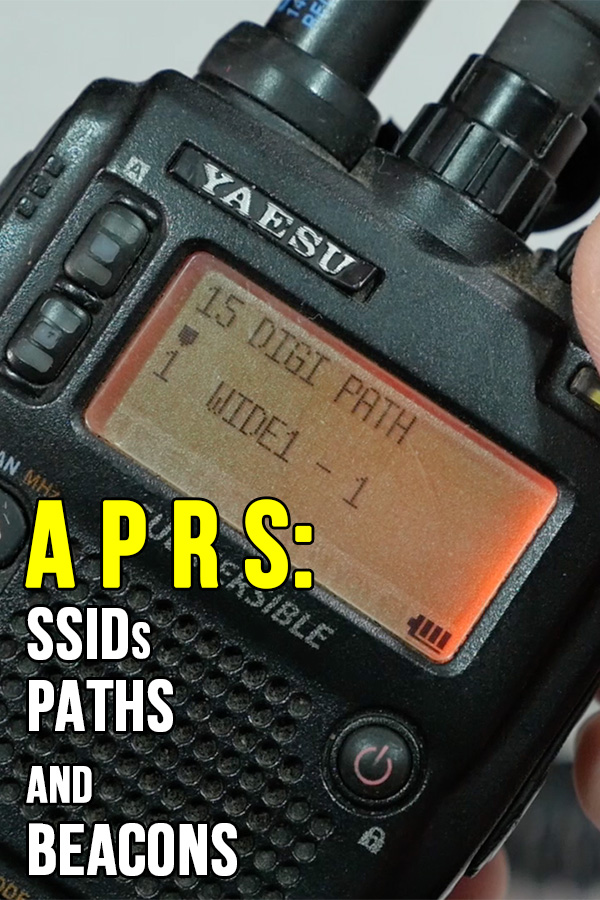
 So in talking about paths, we use a WideN-N designator, where N is the number of hops we want the packet to travel. A path of Wide1-1 will go one hop and Wide2-2 will go out 2 hops. In the N-N the first number is the number of total hops and the second number is a counter. So when a digipeater receives a packet with a Wide2-2 path, it will decrement the counter to Wide2-1 and send it on it’s way. The next digipeater, seeing a Wide2-1 will decrement the path to Wide2-0 and send it out. The packet, counted down to zero, will now expire. We will often combine a Wide1-1 and Wide2-2 to our path to limit packet travel to three hops. A three hop path will reliably get your signal out 120 miles and in only very limited cases do we want our packets to travel more than three hops.
Remember, each hop can multiply a packet’s propagation in all directions, so with the first hop you may hit 1 or 2 digis, but then the second hope could hit another four and the third hop light up 8 or 16. You can see how congestion can easily ensue if you go out more than three.
APRS packets will have a setting of either one or two digipath indicators. For a home station, or any stationary object we will often use a generic path of just Wide2-2 or a specific path of the callsign of a nearby wide area digipeater for the first hop and then the generic Wide2-1 or Wide2-2 depending if we want the packet to go out 2 or 3 hops.
So why not Wide1-1 for the second hop of a stationary object. The reason is that a digipath of Wide1-1 is usually used by low profile digipeaters that fill in underserved areas. A Wide digi will digipeat both Wide1-1 and Wide2-N packets but only low profile digis will ignore Wide2-N packets to reduce congestion. So we don’t want to use them for home stations, that path should be reserved for mobile or portable stations.
Mobile stations will use a path of Wide1-1 for the first position and Wide2-2 for the 2nd. That gives your mobile’s packet three hops out. Both low profile and Wide digis will potentially pick up the Wide1-1 path giving us a better chance of reception and then the Wide2-2 will go out two more hops.
So to summarize, home stations should use either: Digi Callsign and Wide2-1, or just a Wide2-2. Mobile and portable stations use Wide1-1, Wide2-2. Keep your path to 2 or 3 hops. Anything more will create congestion in the system.
Beacon Rate
Since APRS is an automatic protocol, you will need to set a rate of how often your station will send out a beacon or packet. Trackers will want to beacon more often, since their location frequently changes, but home stations will need to beacon less often. APRS is a real-time communication system, so there is an expectation that you should be able to get a general idea of the local APRS landscape within 10 minutes of arriving on scene. For the most part I agree with that statement and recommend that home stations and digipeaters beacon at 10 minute intervals. But this can cause congestion in a densely populated area, so backing off home station’s beacon rate to once every 20 or 30 minutes is perfectly acceptable.
Trackers on the other hand need to beacon more frequently. The faster you are moving, the more often you should beacon. 1 minute intervals for a tracker moving at highway speeds isn’t out of the question. If I’m on my bike, I’ll set my rate to 2 minute intervals. Walkers will go even slower. Of course this is a generalized rule and its acceptable to pick a beacon rate that’s appropriate to the application. I’ve tracked parades and will set the beacon rate very high, like every 30 seconds, in order to have that level of granularity on the map.
Trackers like the Tinytrack, Opentracker or Kenwood radios will use a feature called Smart Beaconing. They will adjust their rate dynamically based on the speed and direction change of the vehicle. If your tracker device has Smart Beaconing, consider using it for vehicles moving faster than 5 miles per hour. With bikes or pedestrians, I would manually set the beacon rate.
The Beacon Box
One of the advantages of using Wide or Wide1-1 in the first position of the path is for low level digipeaters to pick up the packet and send it along to a higher profile digi. You may ask why we need these small digipeaters if there is a network of wide digis available. Digipeating is like ‘battle of the bands’ where the loudest signal usually wins. If you are using handheld or low powered tracker in your APRS activity, it may not be reliably picked up by the wide digi. So the deployment of low profile digipeaters can fill in the holes. I’ve done just that with my beacon box.
![]() The beacon box is a 2 meter mobile radio and an older TNC that I programmed to digipeat only packets with my callsign in the first position of the path. The wide digi will pick this packet up and send it along the network. The need for this box came when I was volunteering for a cross country ski race. APRS coverage was sketchy in the woods with my 5 watt handheld, but with the box sitting in my car in the parking lot, I was able to reliably transmit my position during the day. So if you are using low power APRS trackers for an event, adding a low power digipeater like this may be just the answer to filling in the holes and low spots in your network. I’ll post the commands I used for the beacon box on my website.
The beacon box is a 2 meter mobile radio and an older TNC that I programmed to digipeat only packets with my callsign in the first position of the path. The wide digi will pick this packet up and send it along the network. The need for this box came when I was volunteering for a cross country ski race. APRS coverage was sketchy in the woods with my 5 watt handheld, but with the box sitting in my car in the parking lot, I was able to reliably transmit my position during the day. So if you are using low power APRS trackers for an event, adding a low power digipeater like this may be just the answer to filling in the holes and low spots in your network. I’ll post the commands I used for the beacon box on my website.
That’s the advantage of APRS. Since it’s a disconnected system, it’s easy to add these fill-ins and temporary sites to improve coverage on a temporary basis.
Have questions or comments? or What is your experience with APRS? I’d love to hear it. Please leave a comment down below, I do read and respond to them. Your comment may even be picked up in a future video.
Recent Comments