When you start wiring your ham radio shack, the problem you run into is that there are never enough power connections. One solution of course are the multi tap power distribution bars like MFJ or West Mountain radio sells. These bars have fused connections and multi outlets with Anderson Powerpole connections. But maybe that’s overkill for your needs and a simple two way splitter may be enough. So for today’s project, I’ll be building a DC power splitter with Anderson Powerpoles on the ends.
I don’t know if you are familiar with Anderson Powerpoles or not, but they are genderless connectors that are relatively easy to install and if installed correctly, almost fool proof in connecting. In the ham radio world we use the red and black connectors for DC power. Red will be positive and Black negative. The connectors come in three different sizes: 15, 30, and 45 amp. The plastic shells are the all the same size, the only difference is the size of the metal crimp connectors that insert into the shells. 15 amp connectors are designed for 16-18 gauge wire, 30 amp for 12 – 14 gauge, and 45 amp for 10 gauge wire. You can buy kits of assorted connectors on Amazon and that’s what I’ll be using for this project.
As for installing the inserts onto the wire, you can solder them, or use a tool like this, but if you are serious in using Powerpoles, I recommend investing in a crimping tool. You can get them for about $30 or so online and the proper crimper will give you a more secure connection than this tool ever will. I used to solder the connectors, but you have to be very careful in soldering because if you get solder on the contacts, they will be more difficult to insert into the shell.
So let’s assemble the parts and tools for our power splitter. You will need a wire cutter and stripper and also the power pole crimping tool. As for materials, you will need 2 six inch pieces of 14 gauge red/black zip wire, six power pole shells, 4 30 amp inserts and two 45 amp inserts.
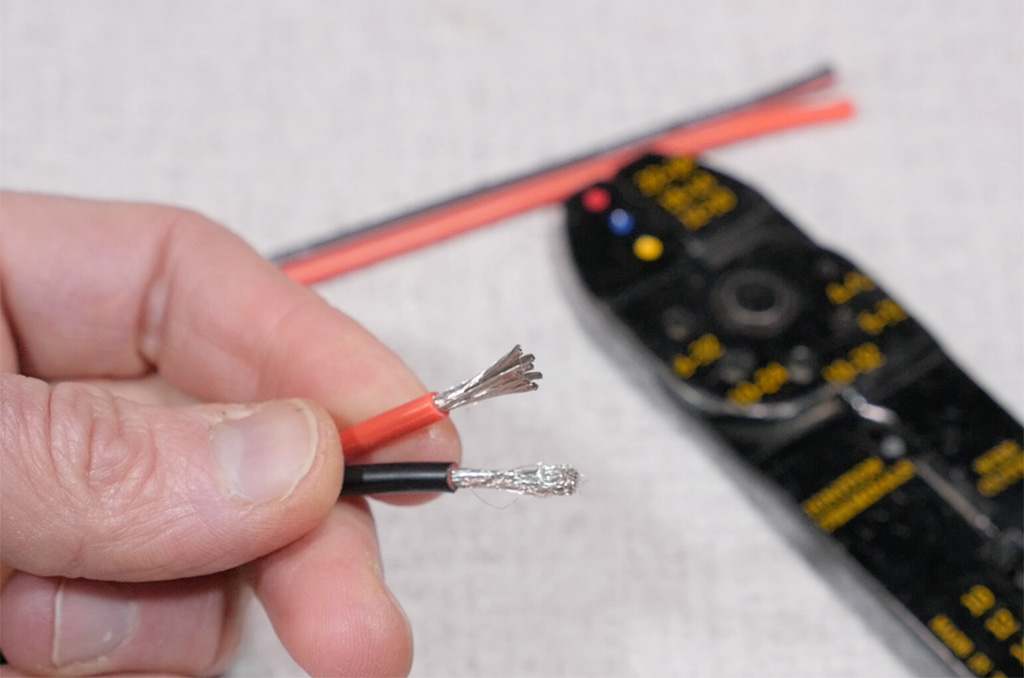 First, strip the insulation from the 14 gauge zip wire. I leave about a centimeter on one end and a little less than a centimeter on the other. Since you will need to twist two wires together, a little extra bare wire is helpful. Next twist together the two black wires, place a 45 amp insert into the crimper and insert the wires.
 Crimp them down. Do the same with the red pair. Once the two inserts are crimped on, you can then insert the connectors into the shell. I’ll use a little screwdriver to help coax them in. When you here the little click, you know they are all the way in.
 Next install the individual 30 amp connectors on the other four wires. Give the wire a little twist, put it into the connector and crimp. If there get some stray wires, that’s ok, you can trim them with the wire cutters. Once the connectors are crimped, insert them into the shells, red wire into red shell and black into black, using the small screwdriver to coax them in as needed.
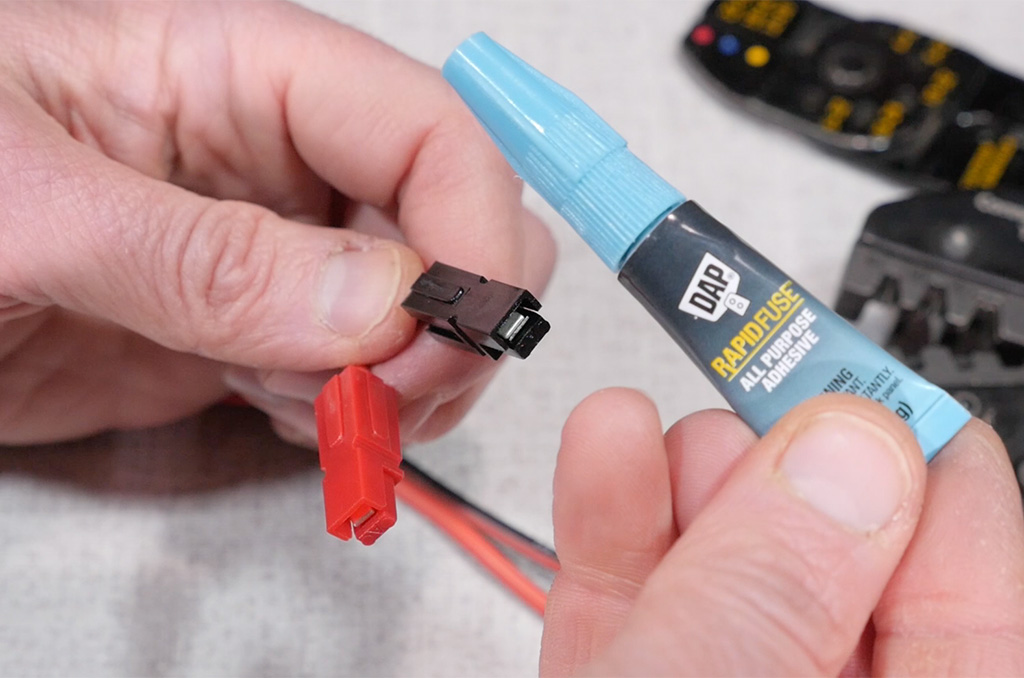 Finally the shells need to be locked together. When you hold the open end of the connector facing you, the red will be on the left with the flat portion of the connector on the bottom. Some power pole kits will come with little roll pins to secure the shells, but I like to use a dab of glue to make them permanent. I figure I won’t be taking these apart, so glue is fine.
That’s all there is to it. You can also dress the ends of the plugs with shrink wrap if you wish, but that’s not necessary. Now you have the flexibility of powering two devices from your power supply or battery.
Let me know what you think of this project, please leave a comment below.
Links/Resources
15/30/45 Amp PowerPole Connector Assortment Kit:
https://amzn.to/2XLZgBJ
PowerPole Crimping Tool
https://amzn.to/2UrOb6E
Red/Black 14ga zip wire
https://amzn.to/2EHDiXQ
Support Ham Radio Q&A by shopping at Amazon:
http://amzn.to/2kO6LH7

Recent Comments